Search
Search Results
SearchNuMaker ,
find 52 items
- Sort by
- Most recent
- Popularity

Product
Tool
Learning
Watch time - 8:24
The video introduces Nuvoton's MPU N9H30's development set-up for Linux and Non-OS, taking NuMaker-emWin-RDK-N9H30 for example. Starting from the EVB introduction to BSP and related software downloads.
-
User manuals and related resource can be downloaded
https://www.nuvoton.com/products/gui-solution/gui-reference-design/numaker-emwin-rdk-n9h30/
First, we introduce how to program Linux OS to the N9H30 evaluation board
Find the N9H30 evaluation board resource that we used on Nuvoton’s Github and download the VMware Image
https://github.com/OpenNuvoton/MPU-Family
VMware application can be downloaded from the VMware website
https://www.vmware.com/tw/products/workstation-player/workstation-player-evaluation.html
First, open the VMware
Find the ubuntu_NUC970_980_Linux folder we downloaded
Choose Ubuntu 64-bit_nuvoton.vmx
Choose Play virtual machine
The password is “user”
It will take a while to open this application for the first time
Open the terminal when the system is ready
Enter NUC970_Buildroot-master folder
After entering the folder, we need to update the Buildroot tool
Enter the command as shown below
“git reset –hard”
“git pull”
After updating, enter the dl folder
Remove the original Linux kernel and u-boot
Enter the command as shown below
“sudo rm -rf linux-master.tar.gz uboot-master.tar.gz”
After entering, enter the password “user”
Leave the dl folder and enter the Buildroot folder
Enter the “make clean” command
You don’t need to do these steps unless updating Buildroot tools
Now, we set up the evaluation board configuration
Enter configs folder to search evaluation board name
Back to buildroot after searching
Enter “make nuvoton_n9h30_emwin_defconfig” to generate configuration file
After finishing these step, enter “make” to compile
It will take about three hours to compile
After compiling, copy the two files below to windows
“/NUC970_Buildroot-master/output/images/uImage”
“/NUC970_Buildroot-master/output/build/uboot-master/u-boot.bin”
Create text file ”env-nor.txt”
The content is shown below:
baudrate=115200
bootdelay=1
stderr=serial
stdin=serial
stdout=serial
setspi=sf probe 0 50000000
loadkernel=sf read 0x7fc0 0x200000 0x600000
bootcmd=run setspi;run loadkernel;bootm 0x7fc0
bootargs=noinitrd root=/dev/mtdblock2 rw rootfstype=jffs2 console=ttyS0 rdinit=/sbin/init mem=32M mtdparts=m25p80:0x200000@0x0(u-boot),0x600000@0x200000(kernel),-(user) ignore_loglevel
Then, we need to install NuWriter and related file
The NuWriter is a programming tool provided by Nuvoton. The NuWriter application and firmware code are open-sourced, and users can add new features or develop new user interfaces per user’s application
NuWriter: https://github.com/OpenNuvoton/MPU-Family
Open “NUC970_NuWriter-master”
Enter Driver folder and install “WinUSB4NuVCOM.exe”
Enter /Nuwriter/Release and execute NuWriter
Choose IC number based on the evaluation board
We need to program Image to SPI Flash, so we choose SPI
Here we need to turn the all Power-On Setting to ON
Push Reset button
Return to NuWriter to check the green light and the connection
If it is not connecting, click Re-Connect to reconnect
After confirm the connection, start to program Image
Program the three files to particular address
u-boot.bin program to 0xe00000
env.nor.txt program to 0x80000
uImage program to 0x200000
After programming, turn the Power-On Setting to off
Push the Reset button
Evaluation board can start to boot from SPI-NOR
After booting, we need to find the rcS demo application under/etc/init.d
Enter “chmod 777 rcS” to modify the application
Now, you can see the application on the evaluation board panel
Here, we finish compiling and programming
The next topic is how to compile and program Non-OS code
First, download MDK-Arm from the link below
https://www.keil.com/download/product/
Download the Non-OS BSP provided by Nuvoton
https://github.com/OpenNuvoton/MPU-Family
The BSP includes Keil environment set up user manual
Use Keil need to purchase the related license
After downloading, Open Keil uVision
Click the File on the upper left and choose Open
Go to the BSP that we downloaded choose BSP, SampleCode, emWin_SimpleDemo, KEIL and emWin_SimpleDemo.uvproj
Click Option for Target
Click Device and choose NuMicro ARM9 Database and N9H_series
After setting up, click Rebuild, and it will generate a sample code application which is a binary file
Open the NuWriter and connect it to the evaluation board
Choose SPI and search the application we built
\N9H30_emWin_Non-OS_BSP_v1.04.000\N9H30_emWin_Non-OS_BSP_v1.04.000\BSP\SampleCode\emWin_SimpleDemo\KEIL\obj\emWin_SimpleDemo_FW070TFT_24BPP.bin
Follow the setting and program the file to 0x0
After programming, turn the Power-On Setting to boot from SPI
You can see the demo application on the evaluation
#Basic #Product #Tool #Learning #en
-
For more information, please visit Nuvoton Technology Website: https://bit.ly/3hVdcmC
buy now: https://direct.nuvoton.com/
contact us: SalesSupport@nuvoton.com

Training
Learning
Watch time - 9:51
Take Nuvoton NuMaker-IIoT-NUC980 running Linux as the platform and learn how to develop various functions. Watch this video, you will learn how to use Ethernet to connect to AWS IoT service on NuMaker-IIoT-NUC980 board.
-
For more information, please visit Nuvoton Technology Website: https://bit.ly/3hVdcmC
Buy now: https://direct.nuvoton.com/tw/numaker-nuc980-iiot
Contact us: SalesSupport@nuvoton.com
#Training #Learning #Intermediate #en

Watch time - 4:15
Take Nuvoton NuMaker-IIoT-NUC980 running Linux as the platform and learn how to develop various functions. Watch this video, you will learn how to use cellular, such as LTE or NB-IoT, to connect to network on NuMaker-IIoT-NUC980 board.
-
For more information, please visit Nuvoton Technology Website: https://bit.ly/3hVdcmC
Buy now: https://direct.nuvoton.com/tw/numaker-nuc980-iiot
Contact us: SalesSupport@nuvoton.com

Watch time - 2:44
Take Nuvoton NuMaker-IIoT-NUC980 running Linux as the platform and learn how to develop various functions. Watch this video, you will learn how to connect to network via Ethernet on NuMaker-IIoT-NUC980 board.
-
For more information, please visit Nuvoton Technology Website: https://bit.ly/3hVdcmC
Buy now: https://direct.nuvoton.com/tw/numaker-nuc980-iiot
Contact us: SalesSupport@nuvoton.com

Training
Tool
Learning
Watch time - 8:28
Develop with Nuvoton NuMaker-IoT-M487 and Mbed OS to learn various functions. You will learn from this video to use the NuMaker-IoT-M487 development board and Mbed OS to connect to Microsoft Azure IoT Hub service.
#Tool #Training #Learning #Intermediate #en
-
For more information, please visit Nuvoton Technology Website: https://bit.ly/3hVdcmC
Buy now: https://bit.ly/3bk0AD8
Contact us: SalesSupport@nuvoton.com

Watch time - 3:13
Take Nuvoton NuMaker-IIoT-NUC980 running Linux as the platform and learn how to develop various functions. Watch this video, you will learn how to control GPIO to blink the LED on NuMaker-IIoT-NUC980 board.
-
For more information, please visit Nuvoton Technology Website: https://bit.ly/3hVdcmC
Buy now: https://direct.nuvoton.com/tw/numaker-nuc980-iiot
Contact us: SalesSupport@nuvoton.com

Training
Learning
Watch time - 4:0
Take Nuvoton NuMaker-IIoT-NUC980 running Linux as the platform and learn how to develop various functions. Watch this video and you will learn how to install Buildroot for NuMaker-IIoT-NUC980 board before starting development.
-
For more information, please visit Nuvoton Technology Website: https://bit.ly/3hVdcmC
Buy now: https://direct.nuvoton.com/tw/numaker-nuc980-iiot
Contact us: SalesSupport@nuvoton.com
#Training #Learning #Basic #en

Training
Tool
Learning
Watch time - 5:53
Hello everyone, I am Morgan, the principal engineer of Nuvoton Technology. Today, I will show you how to connect to AWS IoT service using MbedOS on NuMaker-IoT-M487 development board
The sample code is on GitHub, the URL is https://github.com/OpenNuvoton/Mbed-to-AWS-IoT
To avoid typos, use keyword “OpenNuvoton” to search on google.
Find the Nuvoton on GitHub, and click it
On the Nuvoton GitHub page, use AWS as keyword to search the sample code: Mbed-to-AWS-IoT
Right click to copy the URL for later use.
Then enter the URL https://ide.mbed.com
After log in, make sure the NuMaker-IoT-M487 board has selected in the upper right corner. If not, please refer Nuvoton IoT Tutorial series “Get Started with Mbed OS”. There is detailed description of how to add a board.
Click the “Import” on the left of menu bar.
In the “Import Wizard”, click “Click here”
Please paste or key in the sample code URL to “Source URL:”,
Select Import as “Program”
Click “Import Name”, the project name “Mbed-to-AWS-IoT” will be filled automatically.
Then click “Import”.
After sample code imported, click “mbed_app.json” to open it.
To use Wi-Fi, you have to configure SSID and password to match your Wi-Fi AP setting.
In NuMaker_IOT_M487 session of mbed_app.json file, find the “wifi-ssid” to set your SSID. It is at line 44.
And then set password to “wifi-password”. It is at line 45.
Save it and click “Compile” to build the code.
It takes time to compile code, please wait.
You need an AWS account to use AWS IoT Core service. To create a thing, a policy, and certificates, then put the certificate to MQTT_server_setting.h file in the sample code. The sample code has included a certificate provided by Nuvoton for test only, so that you can quickly operate this example. If you don’t have an AWS account, it is recommended that you apply for an account and use your certificates in the example to observe the connection status on AWS IoT console page.
After completed, “Success” will appear in the compile output window.
The browser downloads the binary firmware file directly after a successful compiling. It will be saved in a default download folder. In Chrome, you can click download file and select “Show in folder”.
Then we connect the NuMaker-IoT-M487 USB port to your computer.
Please find the virtual COM port assigned for NuMaker-IoT-M487 in Device Manager. In the tutorial, the “Nu-Link Virtual Com Port” is COMx.
Then use your favorite terminal tool. Here we use Putty. Open the COMx port with 115200 baud rate.
And no flow control settings. Then “Open” it.
Back to the folder you just download the binary firmware file (Mbed-to-AWS-IoT.NUMAKER_IOT_M487.bin). Drag and drop the file to NuMicro MCU drive.
You will see the copying progress dialog box.
You can see the messages on terminal.
The device has acquired IP address from Wi-Fi AP, then successfully connect to AWS IoT and subscribe a topic.
Then press button (SW2) on board to send a message.
You can see the message published to server and received a message from server.
That’s all for this tutorial. Thank you for watching.
Welcome to subscribe to our channel.
If you want to get more information, please contact us “SalesSupport@nuvoton.com”
-
For more information, please visit Nuvoton Technology Website: https://bit.ly/3hVdcmC
Buy now: https://direct.nuvoton.com/tw/numaker-iot-m487
Contact us: SalesSupport@nuvoton.com
#tool #training #learning #intermediate #en

Product
Application
Webinar
Watch time - 59:3
Developing IoT devices can be a painful process. In this webinar, you will learn how to develop an IoT enabled device quickly and easily with Nuvoton IoT platforms. We will cover IoT device system architectures, security consideration, development kits for different cloud services, and the latest practices to bring your IoT products time to market quickly.
Speaker: UE00 Senior Product Marketing Manager, Harry Chen
-
For more information, please visit Nuvoton Technology Website: https://bit.ly/3hVdcmC
Buy now: https://bit.ly/3bk0AD8
Contact us: SalesSupport@nuvoton.com
#Product #Application #Webinar #General #en

Application
Learning
Watch time - 4:3
The purpose of video is to demonstrate functions of NuMaker-RTU-NUC980 within 5 minutes, including Ethernet webserver, Wi-Fi webserver, USB camera, and NFS function.
If you get the NuMaker-RTU-NUC980 board, you can follow this video to implement all the functions
#application #learning #intermediate #en
-
For more information, please visit: https://bit.ly/3hVdcmC
Buy now: https://direct.nuvoton.com/tw/numaker-rtu-nuc980?search_query=Chili&results=1
Contact us: SalesSupport@nuvoton.com
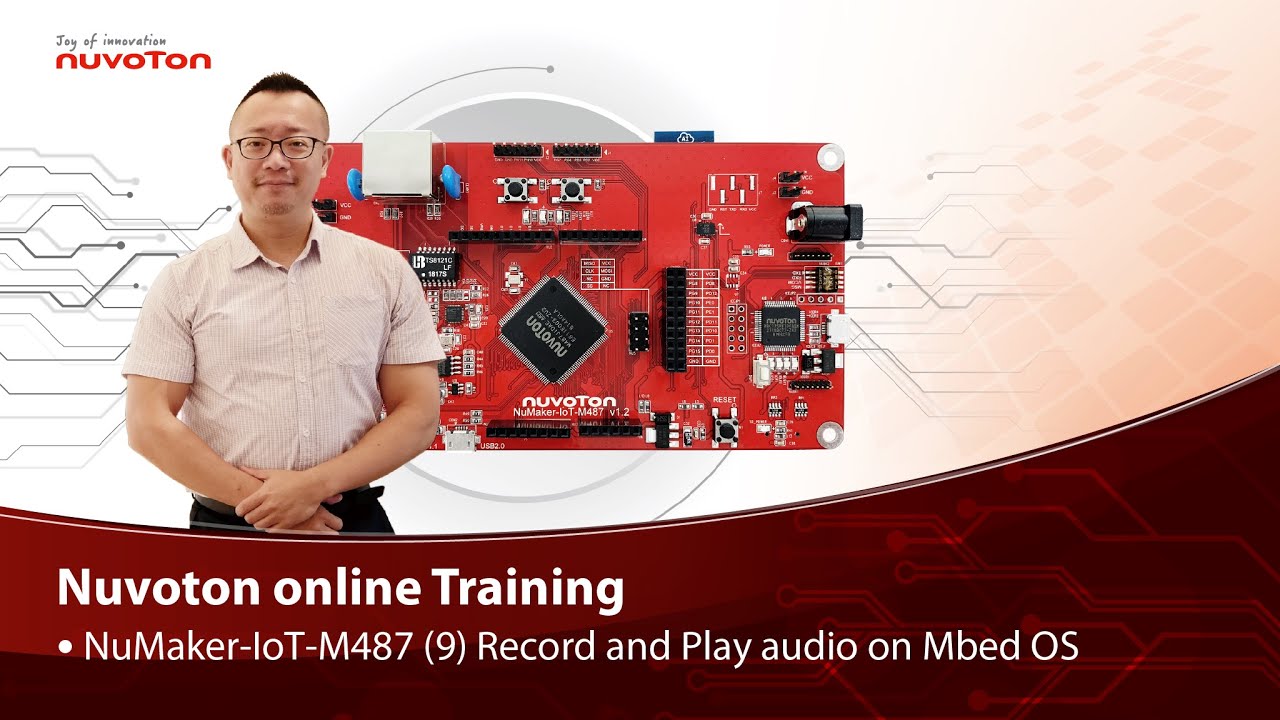
Training
Tool
Learning
Watch time - 5:0
Hello everyone, I am Morgan, the principal engineer of Nuvoton Technology. Today, I will show you how to record and play audio with Mbed OS on NuMaker-IoT-M487 development board.
Open Chrome browser, and enter the URL https://ide.mbed.com to use the Mbed Online Compiler.
After log in, make sure that NuMaker-IoT-M487 board already selected in the upper right corner. If not, please refer Nuvoton IoT Tutorial series “Get Started with Mbed OS” which has a detailed description of how to add a board.
Click the “New” on the left of menu bar, a “Create new program” window will be displayed.
You can see that the Platform has been set to NuMaker-IoT-M487. In the Template, select the "NuMaker audio playback" for this tutorial. Then click OK.
Now you can see that the sample code has loaded on the page.
The sample code has three functions:
1. Record 10 seconds sound and save to Micro SD card
2. Play sounds stored in Micro SD card
3. Loopback. Record sound and play it immediately.
Click main.cpp to open it. Then scroll down to line 421. You can see the functions calls here. It set to loopback only.
Let’s do a little modification. Hit a key on console to start record 10 seconds then play it, and then do loopback.
printf("Press a key to start recording 10 seconds...");
getchar();
demo_record();
demo_play();
demo_loopback();
Save it and click “Compile” to build the code.
Compilation takes a while, please wait.
After the compilation is completed, “Success” will appear in the compile output window.
The browser downloads the binary firmware file directly after a successful compiling. It will be saved in a default download folder. In Chrome, you can click download file and select “Show in folder”.
Please plug an earphone commonly used for mobile phone in headphone jack on NuMaker-IoT-M487 board. For demonstration, we use a headphone splitter cable to connect a microphone and a speaker. Do not put the microphone and speaker too close to avoid feedback howling. Then connect the USB port to your computer and make sure the onboard LED lights up.
Back to the folder you just download the binary firmware file (NuMaker-mbed-AudioPlayback-example.NUMAKER_IOT_M487.bin). Drag and drop the file to NuMicro MCU drive.
You will see the copying progress dialog box.
Please find the virtual COM port assigned for NuMaker-IoT-M487 in Device Manager. In the demonstration, the “Nu-Link Virtual Com Port” is COMx.
Then use your favorite terminal tool. Here we use Putty. Open the COMx port with 9600 baud rate.
And no flow control settings. Then “Open” it.
Press “Reset” on board to run the firmware again.
Press a key on terminal to start record.
Speak for about 10 seconds, then your voice will be played.
That’s all for this tutorial. Thank you for watching.
Welcome to subscribe to our channel.
If you want to get more information, please contact us “SalesSupport@nuvoton.com”
-
For more information, please visit Nuvoton Technology Website: https://bit.ly/3hVdcmC
Buy now: https://direct.nuvoton.com/tw/numaker-iot-m487
Contact us: SalesSupport@nuvoton.com
#tool #training #learning #intermediate #en

Training
Tool
Learning
Watch time - 3:55
Hello everyone, I am Morgan, the principal engineer of Nuvoton Technology. Today, I will show you how to use SD card with Mbed OS on NuMaker-IoT-M487 development board.
Open Chrome browser, and enter the URL https://ide.mbed.com to use the Mbed Online Compiler.
After log in, make sure that NuMaker-IoT-M487 board already selected in the upper right corner. If not, please refer Nuvoton IoT Tutorial series “Get Started with Mbed OS” which has a detailed description of how to add a board.
Click the “New” on the left of menu bar, a “Create new program” window will be displayed.
You can see that the Platform has been set to NuMaker-IoT-M487. In the Template, select the "NuMaker SD-File-System with SD mode" for this tutorial. Then click OK.
Now you can see that the sample code has loaded on the page. LittleFS uses less memory, supports power failure protection. However, LittleFS is different from the FAT file system, so after uses littleFS, the SD card will be formatted as LittleFS. The sample code uses FAT file system as default.
Just click “Compiler” to build the example.
It is in compiling, please wait a moment.
After the compilation is complete, “Success” will appear in the compile output window.
The browser downloads the binary firmware file directly after a successful compiling. It will be saved in a default download folder or the folder based on your browser setting. In Chrome, you can click download file and select “Show in folder”.
Please insert a micro SD card into the card slot on the back of NuMaker-IoT-M487 board, then connect the USB to your computer and make sure the onboard LED lights up.
Let’s back to the folder you just download the binary firmware file (NuMaker-mbed-SD-FileSystem-example.NUMAKER_IOT_M487.bin). Drag and drop the file to NuMicro MCU drive.
You will see the copying progress dialog box.
Please find the virtual COM port assigned for NuMaker-IoT-M487 in Device Manager. In the demonstration, the “Nu-Link Virtual Com Port” is COMx.
Then use your favorite terminal tool. Here we use Putty. Open the COMx port with 115200 baud rate
And no flow control settings. Then “Open” it.
Press “Reset” on board to run the firmware again.
You can see the messages on terminal while accessing SD card.
That’s all for this tutorial. Thank you for watching.
Welcome to subscribe to our channel.
If you want to get more information, please contact us “SalesSupport@nuvoton.com”
-
For more information, please visit Nuvoton Technology Website: https://bit.ly/3hVdcmC
Buy now: https://direct.nuvoton.com/tw/numaker-iot-m487
Contact us: SalesSupport@nuvoton.com
#tool #training #learning #intermediate #en