搜尋
搜尋結果
搜尋key store ,
共找到 12 筆
- 排序
- 依時間
- 依熱門度

創新產品
網路研討會
影片長度 - 53:45
基於 Cortex-M4 的 NuMicro M460 系列微控制器,運行速度可達 200 MHz,支援安全啟動、密鑰儲存 (Key Store)、HyperBus、相機接口、Fractional Audio PLL。適用於 TinyML、工控、消費性產品、輕量級物聯網網關。
【講師】
微控制器產品經理:Roger
微控制器產品經理:Chris
時間:2022/09/14
#CortexM4 #M460 #Webinar #zh-Hant #KeyStore #Hyperbus #TinyML #IoT #Gateway #IndustrialControl #General #Product
-
更多產品資訊,請至新唐科技網站 https://bit.ly/3hVdcmC
購買管道:https://direct.nuvoton.com/tw
聯絡我們:SalesSupport@nuvoton.com

創新產品
前瞻應用
研討會
網路研討會
影片長度 - 1:4:26
新唐科技於 2022 MCU/MPU 新世代產品線上發表會強勢發佈全新微控制器與微處理器系列,基於 Arm® Cortex®-A35、Cortex®-M4、Cortex®-M23 核心,針對不同產業需求與應用場景,提供全面性的 IC 生態系。
基於雙核 64 位 Cortex-A35 高效能核心與單核 Cortex-M4 即時核心的 NuMicro® MA35D1 系列微處理器,Cortex-A35 內核運行速度可達 1 GHz。MA35D1 高效能異核同構微處理器,強調其先進安全特點、硬體圖像加速器、高速連接介面、豐富的外設接口。適用於 Edge Gateway、機器學習、人機介面、工業控制、新能源多種應用場景。
基於 Cortex-M4 的 NuMicro® M460 系列微控制器,運行速度可達 200 MHz,支援安全啟動、密鑰儲存 (Key Store)、HyperBus、相機接口、Fractional Audio PLL。適用於輕量級物聯網網關。
基於 Cortex-M23 的 NuMicro® M254/M256/M258 系列微控制器,內建 LCD 驅動、電容式觸控以及 USB2.0 全速設備,運行速度可達 48 MHz,可運作於 1.75V 至 5.5V 寬工作電壓和 -40℃ 至 105℃ 的工業溫度,更支援 EFT 4.4 kV 與 ESD HBM 7 kV 高抗干擾。適用於各種手持式裝置。
時間:2022/8/17 14:00
00:00:00 intro
00:00:36 NuMicro® MCU/MPU Platforms
00:07:18 NuMicro® M254/M256/M258 Series
00:23:40 NuMicro® M460 High Performance Series
00:44:36 NuMicro® MA35D1 Series
#CortexA35 #CortexM4 #CortexM23 #MCU #MPU #MA35D1 #M460 #M258 #LCD #Touchkey #USB #TinyML #IoT #IoTSecurity #HMI #Gateway #EdgeGateway #HyperBus #CANFD #IndustrialControl #MachhineLearning #NewEnergy #Webinar #zh-Hant #product #application #seminar #zh-Hant #General
-
更多產品資訊,請至新唐科技網站 https://bit.ly/3hVdcmC
購買管道:https://direct.nuvoton.com/tw
聯絡我們:SalesSupport@nuvoton.com

創新產品
學習
影片長度 - 2:47
The NuMicro® MA35D1 series is a heterogeneous multi-core microprocessor targeted to high-end edge IIoT gateway. It is based on dual 64-bit Arm® Cortex®-A35 cores with speed up to 1 GHz, and one 180 MHz Arm® Cortex®-M4 core. Based on the high-performance cores, the MA35D1 series facilities the tiny AI/ML for edge computing.
The MA35D1 supports 16-bit DDR2 and DDR3/ DDR3L SDRAM. For an easy system design and manufacture, the MA35D1 series also offers LQFP and BGA packages stacked with the DDR2/DDR3L SDRAM and density up to 512 MB, which significantly reduces PCB layer, size and electromagnetic interference (EMI).
The MA35D1 series is a trusted system for IoT products' security requirements. It includes several advanced security mechanisms such as Nuvoton Trusted Secure Island (TSI) an isolated secure hardware unit, TrustZone, secure boot, tamper-detection, built-in cryptographic accelerators, and a TRNG, as well as Key Store and OTP memory. All the security operations are performed in the TSI to protect sensitive and high-value data. The features also satisfy customers in IEC 62443 certification requirements.
For high-end edge IIoT gateway requirements, the MA35D1 series provides multiple advanced and high-speed connection interfaces, such as Gigabit Ethernet, SDIO3.0, USB 2.0 HS, and CAN FD, for edge gateway and new energy applications.
For HMI applications, the MA35D1 series provides a LCD display controller with the resolution up to 1920x1080 at 60 FPS, a 2D graphic engine, a JPEG and a H.264 decoder integrated for better graphical HMI effects and video playback.
NuMicro MA35D1 series targets the applications of:
- Edge Gateway
- Lightweight AI/ML
- HMI & Industrial Control
- New Energy Devices
Contact us to get more information. Start to evaluate NuMicro MA35D1 and innovate your products today.
#General #Product #Learning #en #MA35D1 #Nuvoton #NuvotonMPU #NuvotonHMI #NuvotonEdgeGateway #NuMaker-HMI-MA35D1-S1 #NuMaker-IoT-MA35D1-A1
-
For more information, please visit Nuvoton Technology Website: https://bit.ly/3hVdcmC
buy now: https://direct.nuvoton.com/
contact us: SalesSupport@nuvoton.com

創新產品
前瞻應用
學習
影片長度 - 4:14
嗨,大家好我是新唐產品應用工程師Aaron
今天為各位介紹的是新唐安全微控制開發平台- NuMaker-IoT-M2354
NuMaker-IoT-M2354 開發板上帶有新唐-NuMicro M2354微控制器,採用封裝為LQFP128。在正式介紹開發平台前,先快速帶領大家了解NuMicro M2354的各項特色,M2354是基於Arm® Cortex®-M23,新唐最新一代的安全物聯網微控制器,除了CPU本身具備的TrustZone安全防護功能,讓您在單一CPU內實現安全及非安全區的管理。全系列皆帶有 1 MB Flash, 256 KB的SRAM,讓使用者更能專注於軟體的開發而不需擔心資源不足的問題。這點在物聯網裝置常需搭配OS做開發來說來說,尤為重要。
M2354提供豐富的周邊,除了基本的UART I2C SPI,更支援Quad SPI , USB FS OTG, SD Host 以及CAN BUS,而為了便於物聯網裝置常有的數據顯示需求,M2354支援了COM/SEG LCD,多達320點的LCD驅動器,能夠滿足各種智慧家庭及物聯網應用。
除了豐富周邊,M2354最大特色就是支援了許多安全功能:Secure boot提供根信根機制,能確保運行軟體的合法法及完整性,RSA ECC AES SHA各種加密算法能加速聯網時,所需要的認證及資料加密需求,搭配key store的使用能將加解密的過程提升到更高的安全層次。
而為了能符合PSA CertifiedTM Level 3 (物聯網認證標準)的安全需求,M2354針對非侵式的攻擊手法也提供了對應的安全防護措施,防止如側信道及故障故入等攻擊。
那緊接著介紹我們今天的主題,NuMaker-IoT-M2354
基於上述的特色及安全規劃,我們認為M2354非常適合作為物聯網裝置的開發平台,因此製作了一片開發板,希望能加速使用者孰悉M2354的開發及應用。NuMaker-IoT-M2354搭載Bosch BME680環境感測器,能偵測VOC(揮發性有機物) 氣壓、溫濕度等指數,藉由MBED OS開發平台提供的完整連雲範例以及M2354支援的各種加密加速器,可實時且安全的將數據送往雲端(如Pelion,AWS)。開發者也可同步將數據顯示在LCD屏上,新唐BSP提供完整屏的函示庫做為快速開發使用。
NuMaker-IoT-M2354平台提供Wi-Fi及LoRa兩種無線模組,使用者可根據資料傳遞量及功耗表現等需求來決定想採用的無線連接方式,其中需注意的是若使用LoRa模組進行連雲開發,則還須搭配新唐推出的NUC980 LoRa Gateway。NuMaker-IoT-M2354 的LoRa模組共支援兩種頻段,分別為915MHz/433MHz,使用者可在依據開發需求來做選購。
除了提供豐富周邊,為了讓使用者能有更為彈性的開發介面,NuMaker-IoT-M2354同時支援了Arduino UNO及mikroBUS兩種擴充應用,若使用者有NB-IoT或者4G-LTE等連線開發需求,新唐同時也提供這兩種模組的Arduino UNO開發板可以與NuMaker-IoT-M2354做搭配使用(Quectel-BG96A for NB-IoT/ Quectel-EC21A for 4G-LTE)。
除此之外,板子上也提供多種電源供應介面及耗電量測介面以及Nu-link2-Me 燒錄偵錯開發工具,能支援BSP 透過Keil IAR GCC進行開發,也支援Mbed IDE開發系統。
以上就是今天為大家所做的介紹,若有任何問題都歡迎與我們聯繫,謝謝。
#zh-Hant #Learning #Basic #Application #Product
-
相關開發工具及購賣連結:
● M2354 Series
https://www.nuvoton.com/products/microcontrollers/arm-cortex-m23-mcus/m2354-series/
● NuMaker-LoRa-NUC980
https://www.nuvoton.com/products/iot-solution/lora-platform/index.html
● NuMaker-M2354
https://direct.nuvoton.com/tw/numaker-m2354
● Quectel-BG96A
https://direct.nuvoton.com/tw/quectel-bg96a
● Quectel-EC21A
https://direct.nuvoton.com/tw/quectel-ec21a
-
更多產品資訊,請至新唐科技網站 https://bit.ly/3hVdcmC
購買管道:https://direct.nuvoton.com/tw
聯絡我們: SalesSupport@nuvoton.com

創新產品
前瞻應用
學習
影片長度 - 5:20
Hi everyone, I'm Aaron. The FAE of Nuvoton technology.
Today, I'm glad to show you the Nuvoton secure development board, NuMaker-IoT-M2354. The NuMaker-IoT-M2354 is an IoT evaluation board powered by the NuMicro® M2354 series. Before the introduction of NuMaker-IoT-M2354, I will take you to a quick understanding of NuMicro M2354. The M2354 is the latest NuMicro IoT series product which is based on Arm® Cortex®-M23 CPU core technology. The TrustZone® technology based on Armv8-M architecture is a CPU system-wide approach to microcontroller security. The M2354 series carry 1 Mbytes embedded Flash memory and 256 Kbytes SRAM. It's essential for IoT devices with real-time OS requirements. And you can focus on software development without warring about the flash and SRAM resource.
The M2354 series is equipped with plenty of peripherals. In addition to providing UART I2C SPI Timer, it also supports the Quad SPI, USB FS OTG, and CAN BUS. Furthermore, to satisfy the IoT device's display development, the M2354 series built-in 8 COM x 40 SEG LCD controller drives up to 320 dots to meet various smart home and IoT appliances.
In addition to providing many peripherals, the critical feature of M2354 is supporting many security functions. The secure boot ensures the legality and integrity of the running firmware. The hardware crypto with RSA/ECC/AES/SHA accelerators can help the device connect to the cloud fast and safely. Moreover, the M2354 is equipped with Key Store, which could be used with crypto accelerators to enhance the chip security level.
To comply with Arm PSA CertifiedTM Level 3, the M2354 has implemented some countermeasures to protect against non-invasive attacks like side-channel attacks or fault injection attacks.
The NuMaker-IoT-M2354 equips a Bosch environmental sensor, BME680, which contains temperature, humidity, barometric pressure, and VOC gas sensing capabilities. After getting data from the sensor, users can send data to the cloud, such as Pelion or AWS, by Mbed OS. Because M2354 supports hardware crypto, the data can be sent more efficiently and safely. The data could be shown on the LCD panel by the LCD library provided in the M2354 BSP.
The NuMaker-IoT-M2354 contains a Wi-Fi module and LoRa module for wireless applications. Depending on the data throughput and power consumption, you can choose one of them for your IoT applications. In the LoRa network, each node is not connected but must be connected to the gateway before being linked back to the central host, or data can be transmitted to another node through the central host. For example, if choosing the LoRa module for the cloud development, you could use NUC980 LoRa Gateway for your gateway platform.
The NuMaker-IoT-M2354 supports the radio frequency band of the LoRa module on 915MHz and 433MHz, depending on the customer's requirement.
In addition to providing the rich peripheral, the NuMaker-IoT-M2354 also equips the Arduino UNO connector and mikroBUS™ connector for flexible applications.
Suppose you want to develop other wireless connecting features like 4G-LTE or NB-IoT. In that case, the Nuvoton also provides a UNO-to-PCI adapter board to supports Quectel EC21 4G/LTE and Quectel BG96 NB-IoT modules.
The NuMaker-IoT-M2354 also provides multiple power supplies by external power connectors and an ammeter connector that can instantly measure power consumption. In addition, the Nu-link2-Me on the board is a debugger and programmer supporting development on Keil, IAR, GCC, and Mbed IDE.
#en #Learning #Basic #Application #Product
-
Online Purchase Development Tools:
● M2354 Series
https://www.nuvoton.com/products/microcontrollers/arm-cortex-m23-mcus/m2354-series/index.html
● NuMaker-LoRa-NUC980
https://www.nuvoton.com/products/iot-solution/lora-platform/
● NuMaker-M2354
https://direct.nuvoton.com/tw/numaker-m2354
● Quectel-BG96A
https://direct.nuvoton.com/en/quectel-bg96a
● Quectel-EC21A
https://direct.nuvoton.com/en/quectel-ec21a
-
For more information, please visit Nuvoton Technology Website: https://bit.ly/3hVdcmC
buy now: https://direct.nuvoton.com/
contact us: SalesSupport@nuvoton.com

影片長度 - 10:23
新唐 NuMicro M031BT 雙模藍牙低功耗 5.0 (Bluetooth Low Energy, BLE5.0) 提供了 BLE UART 透傳的展示,並實際操作如何使用 AT 命令模式來作設定與使用資料傳輸模式來收發資料。
-KEIL MDK Nuvoton edition M0/M23(Free License)
https://www2.keil.com/nuvoton/M0-M23
-Nu-Link_Keil_Driver
https://www.nuvoton.com/resource-download.jsp?tp_GUID=SW1120200221180521
-M031 BLE AT Command User Guide:
M031_Series_BSP_CMSIS_V3.xx.xxx\SampleCode\NuMaker-M03xBT_XXXXXX\BLE\Doc\M031 BLE AT Command User Guide.pdf
-Related sample codes in the BSP (Board Support Package)
BSP_ Library\M031_Series_BSP_CMSIS_V3.xx.xxx\SampleCode\NuMaker-M03xBT_xxxxxx\BLE\Demo
ATCMD
-App
App Store (Apple devices)
https://apps.apple.com/tw/app/nuvotonble/id1514073524
Google Play Store (Android devices)
https://play.google.com/store/apps/details?id=com.nuvoton.nuble
大家好,我是新唐的工程師Oliver,今天爲大家介紹M031BT的BLE UART透傳範例程式的展示,另外也會簡單介紹一下M031BT的特點。
M031BT的特點是它是一個有豐富周邊且帶有BLE 5.0無線傳輸的MCU,在系統方面CPU可以運行到48MHz,Flash最多可達128 KB,SRAM最多可達16KB,封裝是QFN 5x5mm,在48 pin的IC中算是非常小的,在類比周邊部分ADC是12-bit且采樣速度可以高達2 MSPS,另外還有2組比較器;數位周邊也非常的豐富,像是UART有3組、I2C有2組、PWM有12通道,且PWM解析度可以高達2倍的系統頻率96 MHz、Timer有4個;在無線傳輸部分支援BLE 5.0或2.4G私有協議,可調整的發射功率可達+8 dBm,接收靈敏度可達 -94 dBm
新唐對於藍牙的開發支援了透傳/HOGP/heatbeat三種profile並且有OTA功能,此外central mode/peripheral mode的切換功能,有更多元場景應用的可能性,對於不熟悉藍牙開發的客戶我們也支援AT command協助客戶可以快速開發,透過新唐所推出的M031BT您可以應用在個人醫療儀器、個人保健照護、量測儀器或是智慧門鎖等應用
接下來介紹今天demo的BLE UART透傳,在demo的系統中會有個HOST透過UART傳資料給M031BT,M031BT再經由BLE將資料傳送給手機,或由手機發資料透過BLE傳送到M031BT,再由M031BT的UART傳給HOST,再這個dome中分爲兩種模式一種是AT Command,是用來對M031BT做基本設定,另一種模式是資料傳輸模式也就是透傳模式,M031BT會將UART收到的資料轉爲BLE送出去,或將BLE收到的資料轉爲UART再給HOST,這兩種模式的切換是透過HOST控制高低准位並且輸入到M031BT的GPIO來切換
在開始測試之前我們需要先準備測試環境,我們使用NuMaker-M031BTYE一台電腦當作HOST,NuMaker-M031BTYE上的Nu-Link2-Me當作USB轉UART的橋接器,M031BT的UART脚位PA0/PA1會經由VCOM switch連接到Nu-Link2-Me
的UART引脚,我們只要把VCOM指撥開關的Pin1/Pin2撥到ON就可以連接
另外M031BT的模式控制脚位PB0若連接到VDD是AT command 模式,若連接到GND是資料傳輸模式,模式控制脚位預設內部上拉至VDD,所以預設是AT command 模式
現在我們將USB線接上NuMaker與電腦後,開啓裝置管理員確認com port是否有連接上,確認是COM3就可以關掉了,接著電腦上需要安裝任一種的串列通訊軟體,影片中我們使用Putty當作範例,安裝完Putty之後,開啓Putty選擇Serial,輸入剛剛確認的COM3還有115200的波特率,按下OPEN
再來我們需要將AT Command的固件下載到M031BT,我們開啓ATCMD這個範例的專案,按下編譯,編譯完之後按下載等待下載完成,下載完成後我們可以看到Putty的視窗中已經有打印出一些信息了,代表燒錄成功
再來是如果安卓裝置要在Google Play Store下載App若是iOS的話要在App Store下載後安裝,影片中以安卓來當作範例,開啓Paly Store並輸入Nuvoton BLE看到後點選安裝,等安裝完成後初步的環境設置就算完成了
接著來看看ATCMD支援的命令有哪些,這是AT command 的列表,主要都是用來查看M031BT的參數或是設定M031BT的參數
例如輸入AT是測試命令,查看M031BT在AT command模式是否正常;
輸入AT+HELP? 是查看支援那些命令;
輸入AT+UART是察看UART波特率是多少,預設是115200,也可以設定波特率,目前支援五種不同的波特率;
AT+NAME可以看裝置名稱或修改裝置名稱;
AT+ADVINT可以查看目前的廣告間隔時間與設定廣告間隔時間;
AT+ADVEN可以開啓廣告,讓手機可以搜尋的到,要注意的是預設沒有開的AT+TXPWR可以設定輸發射功率,目前有三種段數可設定,分別是0/4/8 dBm; AT+SLEEP可以讓M031BT沒發送資料時候進入睡眠模式,節省功耗
其他詳細說明可以參考這份表格或M031 BLE AT Command User Guide這份文件,這個文件在BSP裏面可以找到
接下來我們來實際操作,這一頁說明ATCMD這個範例程式的預設參數設定,像是波特率是115200,發射功率是+8 dBm,大家可以參考一下。
我們先前開啓過裝置管理員確認設定是COM3還有波特率是115200,接著NuMaker-M031BTYE的reset 按鍵,就可以看到M031BT AT Command的字顯示在PuTTY的視窗中,那預設模式脚位的PB0預設是上拉到VDD,所以預設是AT command 模式
接著使用鍵盤輸入AT按下enter按鍵,若出現OK代表AT command 模式是正常,即可輸入其他指令
若要查看支援那些指令,可以輸入AT+HELP?再按下enter鍵,就會出現全部支援的指令有哪些
若要看現在的波特率設定輸入AT+UART? 再按下enter鍵,就可以知道UART目前的波特率
廣告的間隔時間可以查看也可以修改,輸入AT+ADVINT? 就可以得到目前的廣告間隔時間,看到目前是160,這個數值每個單位是0.625us,也就是100ms,間隔時間的設定會影響到平均的功耗,這時間也可以修改,間隔時間越長平均功耗越低,不過也是要看應用需要多少時間
再來我們輸入AT+ADVINT=320可以看到回復OK,代表時間已經改爲200ms,我們可以再次輸入AT+ADVINT?得到間隔時間是320,確認修改成功
輸入AT+ADVEN可以開啓廣告讓手機可以搜尋的到,預設並沒有開啓,所以輸入開啓的指令
輸入AT+ADDR?可以查詢BLE設備位址
再來我們可以輸入AT+NAME?來查詢BLE設備的名稱,我們可以看到裝置名稱是NVT-M031BT,
打開手機的APP來搜尋看看,搜尋到的就是NVT-M031BT
那也可以修改BLE設備的名稱,只要依據前面的表格下指令就可以
再來是數據傳輸模式演示,也就是透傳模式,我們首先再AT command模式下輸入AT+ADVEN啓用廣告可讓手機搜尋的到,再來開啓NuBLE掃描並連接到NVT-M031BT,接著我們必須要手動將模式控制引脚PB0如畫面上的連接到GND,就可以切換成爲數據傳輸模式也就是透傳模式
再來我們在文字輸入欄位中輸入字符串,然後點擊SEND按鍵,那麽手機上輸入的資料就會透過BLE傳送資料到M031BT,M031BT再將收到的資料經由UART透過Nu-Link2-Me傳送到PC的終端窗口中
剛剛已經演示過兩種模式的使用方式,在相關資源部分
基本的開發環境KEIL我們提供的免費許可證,依照連結網頁內的步驟來做只要使用新唐的M0/M23 MCU就可以免費使用,另外Nu-Link的driver也提供連結下載
另外關于影片中的M031 BLE AT Command用戶指南已經放入BSP內,裏面有更詳細的操作與說明,BSP可從官網下載,APP部分也附上連結,方便大家使用
以上是這次的教學影片,感謝您的收看。歡迎訂閱我們的頻道。
如果您想知道更多資訊歡迎聯絡我們!
-
更多產品資訊,請至新唐科技網站 https://bit.ly/3hVdcmC
購買管道:https://direct.nuvoton.com/tw
聯絡我們:SalesSupport@nuvoton.com

培訓
工具
學習
影片長度 - 3:24
1. Show how to use the ICP Programming Tool to store the firmware to the SPI Flash device inside Nu-Link2-Pro, then after connecting the target chip, press the trigger button to complete offline programming.
2. Demonstrate how to use the ICP Programming Tool to store the firmware to the SPI Flash device inside Nu-Link2-Pro, and then connect the target chip. The external signal completes offline programming through the Control Bus interface. This interface connecting to the automatic programming machine is very convenience.
-
For more information, please visit Nuvoton Technology Website: https://bit.ly/3hVdcmC
Buy now: https://bit.ly/3bk0AD8
Contact us: SalesSupport@nuvoton.com
#en #Tool #Training #Intermediate #Learning

創新產品
學習
影片長度 - 5:0
Introduce the waterproof and noise immunity of ML56 touch key.
Hello! Everyone! I am Nuvoton FAE Tim.
Today, I will show you the waterproof and noise immunity of ML56 touch key.
First introduce the waterproof and noise immunity of ML56 touch key.
Good waterproof function, support finger touch with 2 mm depth water droplet.
IEC 61000-4-6 conducted noise immunity (CNI) with 10 Vrms noise voltage.
Next, we will explain the related parameter settings of the ML56 touch key, and first explain the touch sensitivity.
#Pulse Width (Touch key sensing pulse width time control)
Touch key sensitivity can be adjusted by setting Pulse Width properly, shorter Pulse Width setting comes with poor sensitivity and less power-consumption, vice versa.
Then explain the stability of touch performance, Part 1.
#Times (Touch key sensing times control)
Touch key raw data stability can be adjusted by setting Times properly, shorter Times setting comes with poor raw data stability and less power-consumption, vice versa.
Stability of touch performance, Part 2.
#IIR (IIR filter)
IIR filter can control the ratio of current raw data and previous one. User can enable IIR Filter to be against noise. It will increase the touch response time when enables IIR Filter.
Stability of touch performance, Part 3.
#Debounce (Touch key debounce)
Touch key stability can be adjusted by setting Debounce properly, the debounce times for touch key entry (on) and release (off) detection, shorter Debounce setting comes with faster touch response time, vice versa.
Stability of touch performance, Part 4.
#Trace Baseline (Baseline is generated by “Calibration”)
Touch key auto environment compensation is an algorithm that baseline tracking each touch key automatically at power-up and keeps compensating environment variation affects touch key performance during runtime.
Based on the above parameter description, the following introduces the waterproof and noise immunity parameter settings.
The first is waterproof parameter setting.
Good waterproof function, support finger touch with 2 mm depth water droplet. Touch key system parameters are shown in the table
Pulse Width = 500 ns
Times = 128
Next is the noise immunity parameter setting
IEC 61000-4-6 conducted noise immunity (CNI) with 10 Vrms noise voltage. Touch key system parameters are shown in the table.
Pulse Width = 2 us
Times = 128
IIR New = 6, Old = 2
Debounce Entry = 1, Release = 1
Then we use the ML56 NuMaker Board to show you the waterproof function of the touch key.
Dip the finger in water first, and then touch the touch key. Repeat the above actions, we can see that the touch key still works normally and is not affected.
Finally, we use the ML56 NuMaker Board to show you the noise immunity ability of the touch key.
Turn on the walkie-talkie first, and then interfere with the touch key at close range, we can see that the touch key still operate normally and is not affected.
That's all for today's video, thank you everyone!
If you have any questions, please contact us.
-
For more information, please visit Nuvoton Technology Website: https://bit.ly/3hVdcmC
Buy now: https://direct.nuvoton.com/tw/low-power-8051-series/
Contact us: SalesSupport@nuvoton.comon.com
#Product #Learning #Basic #en
#Basic
#ML56
#NuMicro
#Pulse Width (Touch key sensing pulse width time control)
#IIR (IIR filter)
#Product
#en
#Trace Baseline (Baseline is generated by “Calibration”)
#Times (Touch key sensing times control)
#8051
#Learning
#Debounce (Touch key debounce)
#Nuvoton
#touch key IC
#noise immunity
#low power
#ML54
#waterproof
#MCU
#ML51

培訓
工具
學習
影片長度 - 3:24
Hello everyone I am Chris, the Field Application Engineer from Nuvoton Technology.
Today I will introduce the programming and debugging tool, called NuLink-Gang, and NuLink2-Pro. And I will show you in what kind of situation you can utilize the tools.
During system development, Nuvoton provides three IDE interfaces: KEIL, IAR, and NuEclipse for user to develop source code.
When programming the Chip, Nuvoton provides ICP programming Tool in PC and the debugger Nu-Link2-Pro for users to perform debugging and programming function.
User who uses all of the Nuvoton Nu-Maker boards series can develop through the Nu-Link2-Me debugger and programmer; it’s attached to the board.
During the mass-production stage, there are 2 modes for programming the target chip. One is online programming and the other is offline programming.
At first, in online programming mode, user can use ICP programming Tool and a Nu-Link2-Pro to program a target chip. Besides, if it needs to program several chips at one times, the Nu-Link Command Tool supports program multiple develop board by several Nu-Link2-Pro.
Nu-Link2-Pro also supports drag-and-drop Flash programming. User can intuitively complete the programming action.
Nu-Link2-Pro
In offline programming mode, user can pre-store the programming file in SPI flash, USB flash drive, or SD card. When user wants to program the target chip, pressing the programming button on Nu-Link2-Pro to complete the programming action.
If it needs a large number of ICs to be programming, it recommends using the Nu-Link-Gang programmer. Nu-Link-Gang programmer can perform offline programming on four different chips at a time, significantly increasing the programming efficiency. Besides, Nu-Link-Gang programmer can also use the control bus to connect with an automatic programming machine for automatic programming.
In the system upgrade, Nu-Link2-Pro also provides five standard communication interfaces such as SPI, I2C, UART, RS485, and CAN for transmission, which is convenient for users to upgrade the system.
That’s all for the introduction of Nuvoton’s programming and debugging tool, NuLink-Gang, and NuLink2-Pro. Thank you for watching it. If you want to know more details, please contact us! Thank you.
#Tool #Training #Learning #Intermediate #en
-
For more information, please visit Nuvoton Technology Website: https://bit.ly/3hVdcmC
Buy now: https://direct.nuvoton.com/numaker-m251sd
Contact us: SalesSupport@nuvoton.com
培訓
工具
學習
影片長度 - 5:0
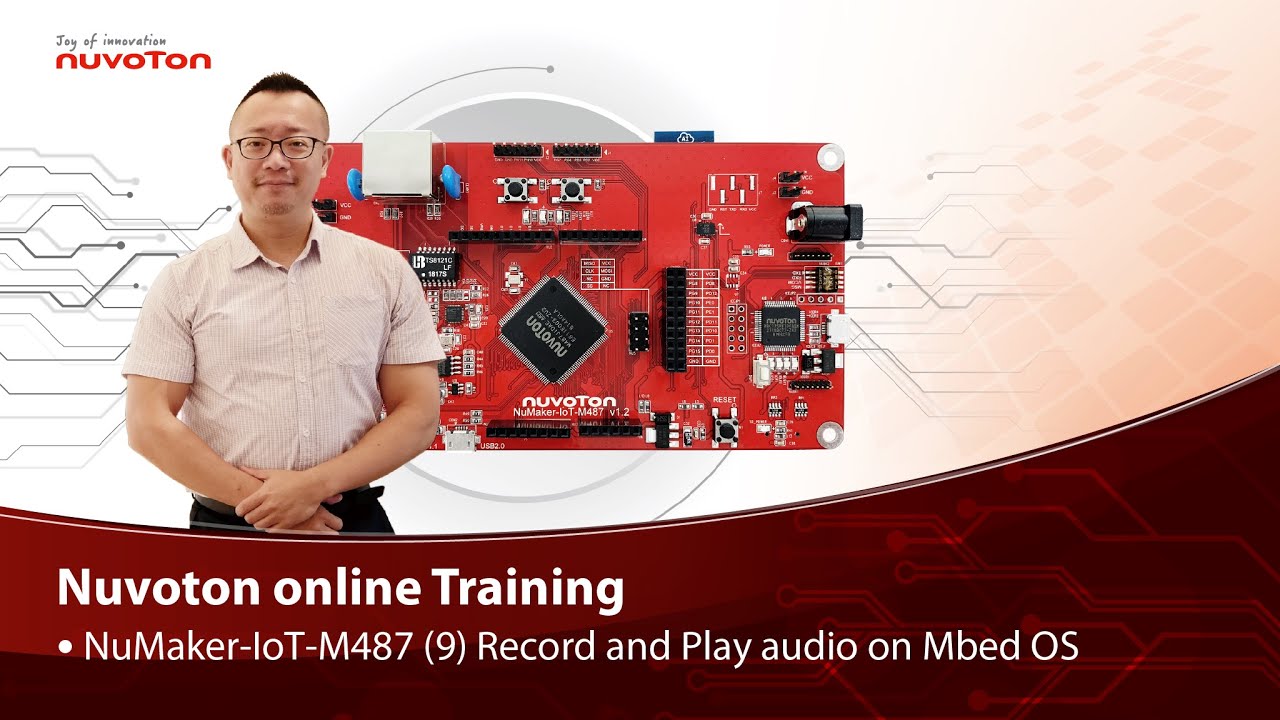
Hello everyone, I am Morgan, the principal engineer of Nuvoton Technology. Today, I will show you how to record and play audio with Mbed OS on NuMaker-IoT-M487 development board.
Open Chrome browser, and enter the URL https://ide.mbed.com to use the Mbed Online Compiler.
After log in, make sure that NuMaker-IoT-M487 board already selected in the upper right corner. If not, please refer Nuvoton IoT Tutorial series “Get Started with Mbed OS” which has a detailed description of how to add a board.
Click the “New” on the left of menu bar, a “Create new program” window will be displayed.
You can see that the Platform has been set to NuMaker-IoT-M487. In the Template, select the "NuMaker audio playback" for this tutorial. Then click OK.
Now you can see that the sample code has loaded on the page.
The sample code has three functions:
1. Record 10 seconds sound and save to Micro SD card
2. Play sounds stored in Micro SD card
3. Loopback. Record sound and play it immediately.
Click main.cpp to open it. Then scroll down to line 421. You can see the functions calls here. It set to loopback only.
Let’s do a little modification. Hit a key on console to start record 10 seconds then play it, and then do loopback.
printf("Press a key to start recording 10 seconds...");
getchar();
demo_record();
demo_play();
demo_loopback();
Save it and click “Compile” to build the code.
Compilation takes a while, please wait.
After the compilation is completed, “Success” will appear in the compile output window.
The browser downloads the binary firmware file directly after a successful compiling. It will be saved in a default download folder. In Chrome, you can click download file and select “Show in folder”.
Please plug an earphone commonly used for mobile phone in headphone jack on NuMaker-IoT-M487 board. For demonstration, we use a headphone splitter cable to connect a microphone and a speaker. Do not put the microphone and speaker too close to avoid feedback howling. Then connect the USB port to your computer and make sure the onboard LED lights up.
Back to the folder you just download the binary firmware file (NuMaker-mbed-AudioPlayback-example.NUMAKER_IOT_M487.bin). Drag and drop the file to NuMicro MCU drive.
You will see the copying progress dialog box.
Please find the virtual COM port assigned for NuMaker-IoT-M487 in Device Manager. In the demonstration, the “Nu-Link Virtual Com Port” is COMx.
Then use your favorite terminal tool. Here we use Putty. Open the COMx port with 9600 baud rate.
And no flow control settings. Then “Open” it.
Press “Reset” on board to run the firmware again.
Press a key on terminal to start record.
Speak for about 10 seconds, then your voice will be played.
That’s all for this tutorial. Thank you for watching.
Welcome to subscribe to our channel.
If you want to get more information, please contact us “SalesSupport@nuvoton.com”
-
For more information, please visit Nuvoton Technology Website: https://bit.ly/3hVdcmC
Buy now: https://direct.nuvoton.com/tw/numaker-iot-m487
Contact us: SalesSupport@nuvoton.com
#tool #training #learning #intermediate #en
培訓
工具
學習
影片長度 - 8:37
NuMaker-IoT-M487 (5)
Connect to Pelion Device Management on Mbed OS
Hello everyone, I am Morgan, the principal engineer of Nuvoton Technology. Today, I will show you how to connect to Pelion Device Management with Mbed OS on NuMaker-IoT-M487 development board.
Because the demonstration needs to store certificate, a MicroSD card is required.
Open Chrome browser, enter the URL https://cloud.mbed.com/quick-start
If you didn’t use Pelion Device Management before, you need to activate your Mbed account to access Pelion. Click the “Activate your free access”. Then log in your Mbed account.
Click “Activate Pelion Device Management account“…
Select the “Start the Connect Tutorial”
Then scroll down to select NuMaker-IoT-M487 (WiFi)
--After selected, scroll down and click “Get started”--
If you have completed previous tutorial, the NuMaker-IoT-M487 board has been selected in your Mbed account.
Please click the “2.2” to import the Pelion Connect Tutorial into your Online Compiler.
It shows the import dialog box, please click Import.
Wait for a moment while importing the sample code.
Click “mbed-os-example-pelion” project name,
Then click “Pelion Device Management” on menu bar, select “Manage Connect Certificates” in pull-down menu to create a Pelion certificate.
You need to provide API key. You can create a new one here.
Log in your mbed account.
Accept
Then click New API key
Assign an API Key name
Click Close
After created an API key, back to online compiler,
Then click Manage Connect Certificate again.
API Key automatically filled here.
Click OK.
Click “Create”, then assign a name for the certificate.
Click OK.
Click the certificate just created to select it, then click OK.
The online compiler will automatically update source code with the selected certificate.
Click “Pelion Device Management” on menu bar again, select “Apply Update Certificate”. An “Update Certificates” dialog box appears. Create it.
Click Download Private Key and save it.
Please make sure that NuMaker-IoT-M487 board already selected in the upper right corner. If not, please refer Nuvoton IoT Tutorial series “Get Started with Mbed OS” which has a detailed description of how to add a board.
In order to use Wi-Fi, you have to configure SSID and password to match your Wi-Fi access point setting.
In the mbed_app.json file, the default Wi-Fi security set to WPA and WPA2 in “nsapi.default-wifi-security” field. Please modify the field “nsapi.default-wifi-ssid” to your Wi-Fi SSID
Then modify “nsapi.default-wifi-password” to your Wi-Fi password.
Click on “Compile” to build it. Have to wait for a while.
Then you can see the last message is “Success!” at the bottom of this page.
The browser will download the binary firmware file directly after a successful compiling. It will be saved in a default download folder or the folder based on your browser setting. In Chrome, you can click download file and select “Show in folder”.
Then we connect the NuMaker-IoT-M487 USB port to your computer and make sure the onboard LED lights up.
Let’s back to the download folder where you can see the binary firmware file (mbed-os-example-pelion.NUMAKER_IOT_M487.bin). Drag and drop the file to NuMicro MCU drive.
You will see the copying progress dialog box.
Please find the virtual COM port assigned for NuMaker-IoT-M487 in Device Manager. In the tutorial, the “Nu-Link Virtual Com Port” is COMx.
Then use your terminal tool. Here we use Putty. Open the COMx port with 115200 baud rate, 8 bits, 1 stop bit, none parity, and no flow control settings.
Then “Open” it.
Press Reset button on board to run again.
You can see the connection messages printed on terminal. It shows the board’s IP address obtained from the Wi-Fi access point, and the Endpoint Name.
Then you can see the device resource in Pelion Device Management Portal.
Log in Pelion Portal with the same Mbed account.
Click Device directory. Find the device ID which should be registered state.
Click the Device ID, it shows the Device details.
Click RESOURCES, find the resource 3200/0/5501. Click the resource.
Now, you can press keys in terminal to increase the counter. Or the counter automatically increase 1 by one second. The demo code also updates the counter to Pelion. You will see the value change in the graph.
That’s all for this tutorial. Thank you for watching. Welcome to subscribe to our channel. If you want to know more information, please contact us at SalesSupport@nuvoton.com
-
For more information, please visit Nuvoton Technology Website: https://bit.ly/3hVdcmC
Buy now: https://direct.nuvoton.com/tw/numaker-iot-m487
Contact us: SalesSupport@nuvoton.com
#tool #training #learning #intermediate #en

Home automation with the tubular motor adopting Nuvoton 8-bit industrial microcontroller ML51 series
影片長度 - 4:33
Tubular motors can be easily seen everywhere such as curtains, rolling doors, and automatic clothes racks. As the concept of home automation is spreading widely, those products become more and more popular.
Nuvoton provides completed platform, ML51 series for different needs of tubular motors. It’s based on 1-T 8051 core, running up to 24 MHz core speed. It provides 12-bit ADC detecting motor current and up to 2 sets of analog comparators for overcurrent and overvoltage protection. Much higher safety features for the tubular motors are realized.
105-degree high-temperature resistance makes it suitable for control box exposed outdoors. As for the multiple noises and inference environment, ML51 series provides strong immunity like 8 kV ESD and 4.4 kV EFT.
Hello, everyone, welcome back to Nuvoton’s YouTube channel, I am the product manager of microcontrollers. Today I am going to show
you our successful story, home automation with the Tubular motor, which adopts our latest industrial microcontroller, ML51 series.
Today the topic we are going to talk about is the home automation and motorization system for curtain and doors. These tubular motors can be easily seen around everywhere, like curtain, rolling door, garage door, and automatic clothes rake…and so on. As the concept of home
automation is spreading widely, those products are more and more popular.
For example, the automatic curtain is popularly applied in hotel, new building, hospital and new store, why is this product become more and more popular? Lazy economy becomes a new type of consumption demand, people pursue a time-saving and labor-saving product,
imagined if you have an emitter to control curtain automatically, and smart adjustment with the brightness of outdoor. And the new product hit the shelf is automatic clothes rake, now this new product is not only a hanger but also integrated with UV light disinfection, heating function and fan controller. About the garage door, now integrated more security function, such as overcurrent protection for device longevity, infrared system can be added to increase anti-pinch security.
Nuvoton provides completed platform, ML51 series for different needs of tubular motors. It’s based on 1-T 8051 core, running at 24MHz core speed, provides 12-bit ADC can detect motor current, up
to 2 sets of analog comparator to have overcurrent and over voltage protection so can provide much higher safety feature for the tubular motors. ML51 series also provide from 1.8V to 5V power supply, so whether the AC power or the battery supplied can easily be adapts to different power source.
This series has up to 105-degree high temperature resistance, which also can be very suitable for control box explore at outdoors. As for the multiple noise and inference environment, ML51 series provides strong immunity like 8 kV ESD and 4.4 kV EFT.
Nuvoton provides an easy-to-use development environment, which includes NuMaker board, Nu-Link, BSP and sample codes, those
tools can help you shorten your development cycles. On the backside of each development board, you can find the website which the comprehensive information is available.
Nuvoton has some successful case in China and Europe. We hope to have more new opportunities after releasing this video.
Thanks for watching, if you like this video
please give it a thumbs up, if you have any question can also leave a message at bottom, we will have personal to reply the question soon. The ML51 NuMaker boards are now available at Nuvoton official eStore direct.nuvoton.com. Thank you again for staying with us. Hope to see you soon. Bye~
For more information, please visit Nuvoton Technology Website: https://bit.ly/3hVdcmC
buy now: NuMaker-ML51PC/ http://direct.nuvoton.com/numaker-ml51pc
NuTiny-ML51EB9AE/ https://direct.nuvoton.com/tw/nutiny-ml51eb9ae
contact us: SalesSupport@nuvoton.com