Search
Search Results
Searchtouch key IC ,
find 248 items
- Sort by
- Most recent
- Popularity

Watch time - 29:32
1. 介紹新唐 NuMicro M4 全系列產品組合,包含 M480 系列、M451 系與 NUC505 系列。依據不同的終端應用需求,客戶該如何挑選適合的產品系列。
2. 詳細介紹新唐 NuMicro M480 產品系列的產品特色,M480 子系列的規格比較,特色 IP 的功能說明,以及成功案例。
-
更多產品資訊,請至新唐科技網站 https://bit.ly/3hVdcmC
購買管道:https://direct.nuvoton.com/tw/m4-family/
聯絡我們: SalesSupport@nuvoton.com

Product
Application
Webinar
Watch time - 39:46
In this webinar, we discussed the Nuvoton NuMaker IoT Platforms that are supporting Arm Mbed OS and Pelion Device Management services. We also showcased how you can use these reference designs to build and manage your smart IoT devices and applications.
Host: Austin Blackstone, Lead Developer Evangelist - Arm Pelion / Mbed OS
Speaker: Morgan Du, Principal Engineer - Nuvoton IoT Development
Slides: https://drive.google.com/file/d/1xSSzc0RBZXPjgrEwlC53MFNNMK7vVBOB/view?usp=sharing
Learn more about the Nuvoton IoT platform: https://bit.ly/3gRRvSX
Learn more about the Nuvoton NuMaker-IoT-M487 platform: https://bit.ly/2QSafqW
Shop the NuMaker-IoT-M487 development board: https://direct.nuvoton.com/en/numaker-iot-m487
#Product #Application #Webinar #General #en

Watch time - 2:5
新唐 NuMicro M031/M032 微控制器集成了工作頻率高達 72 MHz,Arm Cortex-M0 內核,16 ~ 512 KB Flash、2 ~ 96 KB SRAM 可供選擇,封裝從 20 到 128 PIN,電壓範圍支援 1.8V ~ 3.6V。
-
更多產品資訊,請至新唐科技網站 https://bit.ly/3hVdcmC
購買管道:https://direct.nuvoton.com/tw/m031-series/
聯絡我們: SalesSupport@nuvoton.com

Training
Junior
Watch time - 17:25
新唐 NuMicro 微控制器家族 I²C 基本功能與範例介紹。
-
更多產品資訊,請至新唐科技網站 https://bit.ly/3hVdcmC
購買管道:https://direct.nuvoton.com/tw/
聯絡我們: SalesSupport@nuvoton.com


Watch time - 9:40
以新唐 NuMaker NUC980 IIoT 為平台,使用 Linux 進行開發,學習開發各式功能,觀看本片,您將學會在 NuMaker NUC980 IIoT上使用 Ethernet 連接到 AWS IoT 服務。
大家好我是新唐工程師 Miya,今天要為各位介紹,如何使用 NuMaker NUC980 IIoT 開發平台連接 Amazon 的物聯網,以下簡稱 AWS
連結網址 https://aws.amazon.com/ ,登入 AWS 帳號
點擊右上角的 “Sign In to the Console”,進入帳號登入頁面
輸入您的帳號密碼,點擊 “Sign In” 進行登入
登入之後,進到 “AWS 管理控制台” 頁面
在搜尋欄位,輸入 “IoT Core”,會出現 IoT Core 連結,點擊進入
在左邊的欄位選擇 “入門” 頁面
在 “設定裝置” 點擊 “開始使用” ,開始設置 IoT 裝置
選擇連接 AWS IoT連線方式。platform 請選擇 Linux, SDK 請選擇 Python。
點擊 “下一步” 進到下一個頁面。
接下來開始註冊一個 IoT Thing,有三個步驟。
首先命名 IoT Thing,接著按下一步。
這個連線套件不會用到,按取消之後跳到下一步。
接下來2個頁面直接按 “完成” “完成”。
系統會跳回到管理頁面。
點擊左側選單 “管理” “實物”。可以看到剛剛建立的 my-IoT 出現在 IoT Thing 裡面了。
接下來要對這個新建立的 Thing 做一些設定,直接點擊新建立的 Thing-my-IoT,進入管理頁面。
在左側選單,選擇 “互動” 。
在互動頁面裡可以看到 Thing 的 HTTPS 連結。 複製此 HTTPS,用戶端應用程序需要知道這個連結,才能夠連接到這個 IoT Thing。
接下來下載安全憑證,請在頁面左側選單,點擊 “安全”,進入憑證頁面。
然後點擊 “建立憑證”。
憑證建立完成會產生三個檔案,分別是憑證、公鑰及私鑰。分別點擊 “下載”以下載這三個檔案,NuMaker NUC980 IIoT 開發平台用戶端進行 AWS IoT 連線的時候會用到。
下載完成之後,點擊 “啟用”,使這個安全憑證生效。
接著還需要下載 AWS IoT 的根憑證,點擊 “CA 下載” 連結,以開啟另一個瀏覽頁面。
點 CA Certificates for Service Authentication 連結,系統會跳到 AWS IoT root CA 的下載頁面。
請選擇第一個根憑證,RSA 2048 bit key,按滑鼠右鍵,另存連結,存到檔案 “AmazonRootCA1.pem”。
下載完成之後,回到剛剛的頁面。
接下來,點擊 “連接政策”,進行 policy 設定。
點擊 “建立新政策”以建立一個新的 policy。
先輸入 policy 名稱。
選擇 “進階模式”,直接編輯 policy 內容。
在Effect 敘述輸入 Allow,允許操作。
在 Action 敘述輸入 “I:*”,接受所有的 IoT 命令。
在 Resource 敘述輸入 “*”, 允許取用 resource。
按 “建立” 建立新的 Policy。
在左側選單,重新點擊 “管理”→ “實物”,選擇 my-IoT thing,回到 my-IoT 頁面。
再次點擊 “安全”,然後選擇剛才建立的憑證。
在憑證頁面左側的選單選擇 “政策”。目前 Policies 還是空的。
打開右上角的 “動作”下拉選單,選擇 “連接政策”。
在 Policy 列表裡面,會出現剛才新建立的 Policy。打勾選取,然後按 “連接 “,完成 policy 的附加。
這時候 Policies 頁面就會出現我們所選擇的 Policy 了。到這邊已經建立好了雲端的 IoT Thing。接下來,要在 NuMaker NUC980 IoT 板上建立用戶端 IoT 應用。
請連接網址 tls.mbed.org/download 以下載 mbedTLS library。
點擊連結 mbed TLS 2.16.3(Apache) 進行下載儲存。
接下來要將把下載的 mbedTLS library 複製到 NUC980 Linux 開發環境下;先解壓 mbedTLS library後,用 git 下載 AWS 的 SDK。
git clone https://github.com/aws/aws-iot-device-sdk-embedded-C
下載完成之後,先刪除他在 external lib 目錄下的 mbedTLS 目錄,這是個空目錄。
將先前下載解壓後的 mbedTLS 目錄移動到 external lib 目錄下就可以直接編譯 AWS SDK 的範例了。
進到 AWS SDK 的 samples 目錄下的 Linux 目錄下可以看到 5 個 範例。要使用的範例是最底下這個 subscribe_publish_sample。
進到這個範例的目錄下。
有三個檔案,需要作一些修改。
首先修改 makefile,將 compiler linker 由 gcc,改為 NUC980 Linux toolchain 的 compiler linker。
51. 往底下找到 CRYPTO_LIB_DIR,修改路徑,將 crypto 刪除,這樣 makefile 就完成修改了。
(~00:25)
52. 接著是 header file,修改MQTT HOST 連結路徑,先前我們在 IoT thing 的 “互動” 頁面所複製
的 HTTPS 連結,將它貼到這裡。(~00:46)
53. CLIENT ID 請任意取一個名稱,不要與其他用戶端名稱重複即可。(~00:55)
54. MY THING NAME 要用前面建立的 IoT Thing 的名稱: my-IoT。(~01:02)
55. 底下的 ROOT CA file name,IoT Certificate file name,以及 IoT private key filename。
56. 前面在建立 IoT Thing 安全憑證過程中,有下載了 Root CA 及 IoT 安全憑證幾個檔案,請將
檔案名稱填寫到這裡。
最後是修改 點 C,系統會將範例程式執行檔放到 root file system 的 usr/bin 目錄下,並將憑證檔案放到 usr/certs 目錄下。 這裡請將憑證指定目錄改為 相對路徑的 ../certs。
接著打 make 直接進行編譯。
編譯需要幾分鐘的時間,影片跳過了編譯部分。
接下來,將編譯好的應用程序複製到 rootfs 的 /usr/bin 目錄下。
然後將根憑證及 IoT 安全憑證檔案複製到 rootfs 的 /usr/certs 目錄下。這裡已經事先複製好了。完成後到 BSP Linux 目錄下,編譯 kernel。
將 kernel 上傳到 IoT 開發板上面執行。
下 ifconfig + udhcpc 指令連接網絡。
由於憑證有時效性問題,需要修改系統時間,以免因為憑證過期導致無法連接。
進到 usr/bin 目錄下,執行 AWS用戶端範例程序。
可以看到用戶端已經成功連接 AWS 雲端。這個範例會不斷地發佈並且接收訊息。
-
更多產品資訊,請至新唐科技網站 https://bit.ly/3hVdcmC
購買管道:https://direct.nuvoton.com/tw/numaker-nuc980-iiot
聯絡我們: SalesSupport@nuvoton.com

Watch time - 4:50
以新唐 NuMaker NUC980 IIoT 為平台,使用 Linux 進行開發,學習開發各式功能,觀看本片,您將學會在 NuMaker NUC980 IIoT 上使用 LTE 與 NB-IoT 連線。
哈囉大家好,我是新唐工程師阿群,今天為大家介紹如何在 NuMaker NUC980 IIoT 板子上如何使用 LTE 模組與 NB-IoT 模組。
首先我們先說明 LTE 模組的部分 NuMaker NUC980 IIoT 板子上的 USB port 位於右上角,請接上 LTE 模組才能上網。
在安裝 NUC980 開發環境 Buildroot 的過程中,我們下 “make nuvoton_nuc980_iot_defconfig” 產生 NUC980 IoT default configuration,當中 LTE 和 NB-IoT 模組相關的設定已經打開。 make 編譯 compile Buildroot 編譯完成後,透過 NuWriter 將 Linux kernel 下載到NuMaker NUC980 IIoT 板子上執行。Linux Kernel 開機完成後,設定 LTE 網路,輸入 “quectel-CM &”,下載檔案,輸入指令 ” wget -c http://http.speed.hinet.net/test_010m.zip ”, 可以看見檔案正在下載。
接下來我們說 NB-IoT 的部分,NuMaker NUC980 IIoT 板子上的 USB port 位於右上角,請接上 NB-IoT 模組才能上網。
需要拿到廠商附的軟體 linux-ppp-scriptsV1.2,根據linux-ppp-scripts裡面的文件說明將相關文件拷貝到 root file system 目錄中。
=> unzip linux-ppp-scripts_V1.2.zip
=> cp linux-ppp-scriptsV1.2/linux-ppp-scriptes/* rootfs/etc/ppp/peers/
= > vim rootfs/etc/ppp/peers/quectel-chat-connect
修改 quectel-chat-connect 裡面 APN,此 APN 參數需要根據電信業者所提供第12行修改 APN 為“internet.iot”
= > vim rootfs/etc/ppp/peers/quectel-ppp
修改 quectel-ppp 裡面的帳號密碼,帳號密碼需要根據電信業者所提供
第 6 行修改 user 和 password 為空白,然後重新 compile Linux Kernel。
編譯完成後,透過 NuWriter 將 Linux kernel 下載到 NuMaker NUC980 IIoT 板子上執行。
Linux Kernel 開機完成後,
設定 NB-IOT 網路 =>“pppd call quectel-ppp &”
設定 DNS =>“ echo "nameserver 8.8.8.8" > /etc/resolv.conf ”
下載檔案 =>”wget -c http://http.speed.hinet.net/test_010m.zip ” , 可以看見檔案正在下載。
以上是這次的 LTE 與 NB-IoT 使用教學影片。
-
更多產品資訊,請至新唐科技網站 https://bit.ly/3hVdcmC
購買管道:https://direct.nuvoton.com/tw/numaker-nuc980-iiot
聯絡我們: SalesSupport@nuvoton.com

Home automation with the tubular motor adopting Nuvoton 8-bit industrial microcontroller ML51 series
Watch time - 4:33
Tubular motors can be easily seen everywhere such as curtains, rolling doors, and automatic clothes racks. As the concept of home automation is spreading widely, those products become more and more popular.
Nuvoton provides completed platform, ML51 series for different needs of tubular motors. It’s based on 1-T 8051 core, running up to 24 MHz core speed. It provides 12-bit ADC detecting motor current and up to 2 sets of analog comparators for overcurrent and overvoltage protection. Much higher safety features for the tubular motors are realized.
105-degree high-temperature resistance makes it suitable for control box exposed outdoors. As for the multiple noises and inference environment, ML51 series provides strong immunity like 8 kV ESD and 4.4 kV EFT.
Hello, everyone, welcome back to Nuvoton’s YouTube channel, I am the product manager of microcontrollers. Today I am going to show
you our successful story, home automation with the Tubular motor, which adopts our latest industrial microcontroller, ML51 series.
Today the topic we are going to talk about is the home automation and motorization system for curtain and doors. These tubular motors can be easily seen around everywhere, like curtain, rolling door, garage door, and automatic clothes rake…and so on. As the concept of home
automation is spreading widely, those products are more and more popular.
For example, the automatic curtain is popularly applied in hotel, new building, hospital and new store, why is this product become more and more popular? Lazy economy becomes a new type of consumption demand, people pursue a time-saving and labor-saving product,
imagined if you have an emitter to control curtain automatically, and smart adjustment with the brightness of outdoor. And the new product hit the shelf is automatic clothes rake, now this new product is not only a hanger but also integrated with UV light disinfection, heating function and fan controller. About the garage door, now integrated more security function, such as overcurrent protection for device longevity, infrared system can be added to increase anti-pinch security.
Nuvoton provides completed platform, ML51 series for different needs of tubular motors. It’s based on 1-T 8051 core, running at 24MHz core speed, provides 12-bit ADC can detect motor current, up
to 2 sets of analog comparator to have overcurrent and over voltage protection so can provide much higher safety feature for the tubular motors. ML51 series also provide from 1.8V to 5V power supply, so whether the AC power or the battery supplied can easily be adapts to different power source.
This series has up to 105-degree high temperature resistance, which also can be very suitable for control box explore at outdoors. As for the multiple noise and inference environment, ML51 series provides strong immunity like 8 kV ESD and 4.4 kV EFT.
Nuvoton provides an easy-to-use development environment, which includes NuMaker board, Nu-Link, BSP and sample codes, those
tools can help you shorten your development cycles. On the backside of each development board, you can find the website which the comprehensive information is available.
Nuvoton has some successful case in China and Europe. We hope to have more new opportunities after releasing this video.
Thanks for watching, if you like this video
please give it a thumbs up, if you have any question can also leave a message at bottom, we will have personal to reply the question soon. The ML51 NuMaker boards are now available at Nuvoton official eStore direct.nuvoton.com. Thank you again for staying with us. Hope to see you soon. Bye~
For more information, please visit Nuvoton Technology Website: https://bit.ly/3hVdcmC
buy now: NuMaker-ML51PC/ http://direct.nuvoton.com/numaker-ml51pc
NuTiny-ML51EB9AE/ https://direct.nuvoton.com/tw/nutiny-ml51eb9ae
contact us: SalesSupport@nuvoton.com

Watch time - 4:45
2019 台灣駭客年會 (HITCON) 的主題為「Trusted in Untrusted World」。
本年度的大會挑戰 (Badge Challenge) 使用這塊台灣電路板,以內建 Arm TrustZone 技術的新唐科技 M2351 微控制器來出題,將密鑰藏在 TrustZone 中。
希望透過此次的 Badge Challenge,傳達資安的概念已經從過去對軟體的著重,擴展至對硬體安全的全盤檢視。
更多產品資訊,請至新唐科技網站 https://bit.ly/3hVdcmC
購買管道:https://direct.nuvoton.com/tw/
聯絡我們: SalesSupport@nuvoton.com
Watch time - 2:45
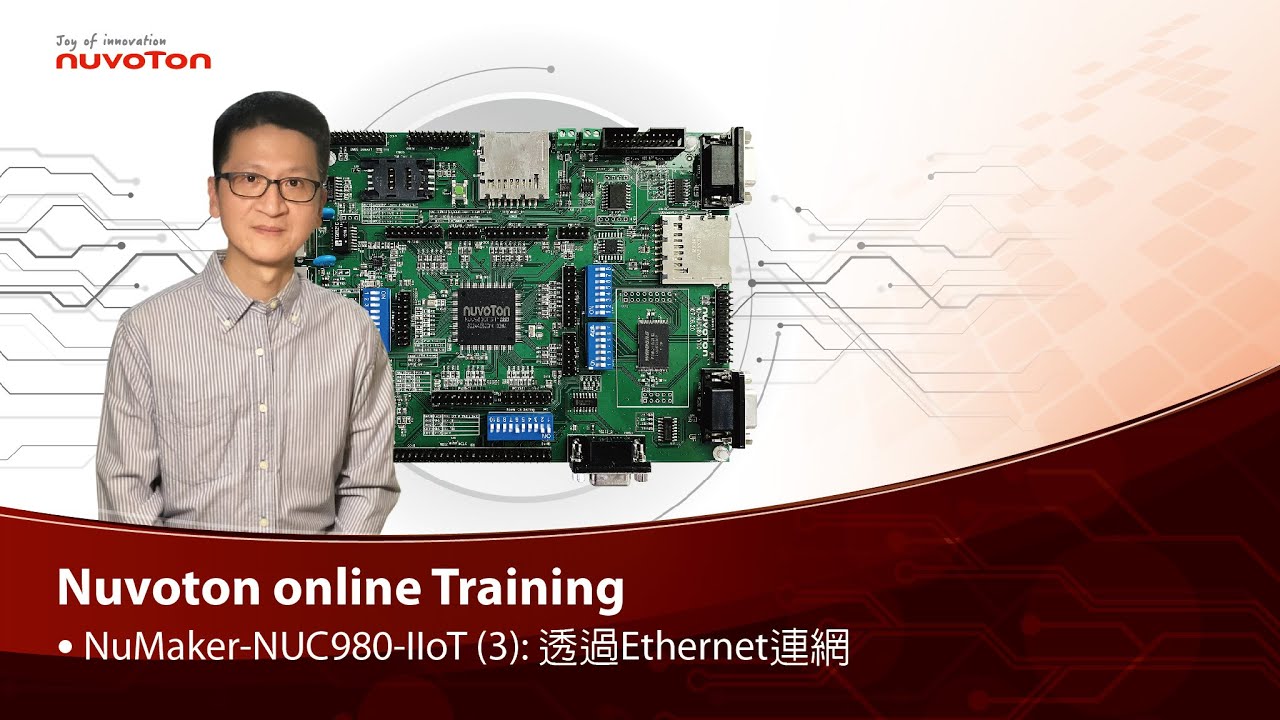
以新唐 NuMaker NUC980 IIoT 為平台,使用 Linux 進行開發,學習開發各式功能。本片示範如何啟用乙太網路連接網際網路。
哈囉大家好,我是新唐工程師 Kevin,今天為大家介紹如何在 NuMaker NUC980 IIoT 板子上透過 Ethernet 連網。
NuMaker NUC980 IIoT 板子上的 Ethernet port 位於右上角,請記得接上網路線才能連網。
在安裝 NUC980開發環境 Buildroot 的過程中,我們下 “make nuvoton_nuc980_iot_defconfig” 產生 NUC980 IoT default configuration,當中 Ethernet 相關的設定已經打開。今天我們要使用一個網路應用程式,curl,在 NUC980 IoT default configuration 中,這個選項是關起來的,所以要透過 “make menuconfig” 打開。
進入選單後,選擇 “Target packages ”,”Libraries ”,” Networking ”,把 “libcurl”和 “curl binary” 這兩個選項打開。儲存設定後離開 menuconfig。
然後再下 make 重新 compile Buildroot。
透過 NuWriter 將 Linux kernel下載到NuMaker NUC980 IIoT 板子上執行
Linux Kernel 開機完成後,輸入 “udhcpc –i eth0” 向 DHCP server 要一個 IP address。
先測試網路的狀況,輸入 “ping google.com”,可以看到網路是通的。
接下來我們要透過剛才安裝的 curl 來下載檔案,我們輸入 “curl http://os.mbed.com”,就可以下載 mbed 首頁的 html。
-
更多產品資訊,請至新唐科技網站 https://bit.ly/3hVdcmC
購買管道:https://direct.nuvoton.com/tw/numaker-nuc980-iiot
聯絡我們: SalesSupport@nuvoton.com

Watch time - 3:31
以新唐 NuMaker NUC980 IIoT 為平台,使用 Linux 進行開發,學習開發各式功能,觀看本片,您將學會如何控制 GPIO 使 LED 閃爍。
哈囉大家好,我是新唐工程師 Kevin,今天為大家介紹如何在 NuMaker NUC980 IIoT 板子上透過 GPIO 讓 LED 燈閃爍。
NuMaker NUC980 IIoT 板子的 Power-on Setting上方有 3 個 LED 燈,分別由不同的 GPIO 控制。最左邊,編號 LED03 的 LED 燈是由 GPIO B8 這根 pin 控制。今天示範如何用程式控制 GPIO B8 讓 LED 燈閃爍。
這是 LED 燈閃爍的程式,在看程式之前,我先為各位說明,在 Linux kernel 中,每一根 GPIO pin 都有編號。每一個 GPIO Group 占用 32個編號,編號為 0 到 31,分配給 GPIO Port A 這個 group,編號 32 到 63 分配給 GPIO Port B,以此類推。
LED03 這個 LED 燈是由 GPIO B8 這根 pin 控制,GPIO B8 在 Linux 中的編號是 40。
回到程式中,我們看到這個程式是透過 system function 執行系統命令,透過 Linux kernel 的 sysfs 控制 GPIO。
第 23 行 system("echo40 /sys/class/gpio/export"); 是將 GPIO
B8 設定成可以用sysfs 控制。
第 24 行 system("echo out /sys/class/gpio/gpio40/direction"); 是將 GPIO B8 設定為 output。
接下來在 while loop 中,透過 system("echo 1/sys/class/gpio/gpio40/value"); 讓 GPIO B8 輸出 high;再透過 system("echo 0 /sys/class/gpio/gpio40/value"); 讓 GPIO B8 輸出 low,中間延遲 1 秒鐘,就可以做到 LED 燈閃爍的功能。
這個程式,main.c,儲存後,進行 compile
輸入 arm-linux-gcc main.c -o gpio_toggle
(輸入 ls)
產生一個執行檔 gpio_toggle
將 gpio_toggle 拷貝到 root file system 目錄中,
(輸入 sudo cp gpio_toggle ../rootfs)
然後重新 compile Linux Kernel
透過 NuWriter 將 Linux kernel 下載到NuMaker NUC980 IIoT 板子上執行
Linux Kernel 開機完成後,輸入 ./gpio_toggle,執行閃爍 LED 的程式。
此時可以看到 NuMaker NUC980 IIoT 板子上的 LED 正在閃爍。
-
更多產品資訊,請至新唐科技網站 https://bit.ly/3hVdcmC
購買管道:https://direct.nuvoton.com/tw/numaker-nuc980-iiot
聯絡我們: SalesSupport@nuvoton.com

Watch time - 4:59
Secure Smart Metering Communication Reference Design
Hi everybody, today we are going to introduce a reference design of Smart-Metering communication card based on NuMicro M2351 Series microcontroller. You can find useful security features based on the Arm Cortex-M23 CPU core with Nuvoton’s in-house technology integration.
The auto-metering is an infrastructure for automatic, remotely, wire or wireless meter data reading. It’s highly possible to be intervened if there is no security mechanism. That is a very typical IoT security issue in the IoT era.
In many countries, there are a lot of Auto-Metering Infrastructure (AMI) projects being undertaken by main electricity power companies worldwide. Most projects start from upgrading the communication modem cards as the first step rather than retiring the meters. The modem card can play as a gateway to monitor the incorrect device operation and data transmission security. Issues of modem card security are covering:
First, a limited performance due to crypto computation efficiency
Second, speed limitation due to interface choice
The third, cost burden due to extra hardware modules for different communication protocols
Nuvoton’s reference design of Secure Smart Meter Communication is an end-to-end security solution for AMI. With the collaboration with SPI-Korea, the solution incorporates a lot of advantages such as TrustZone security for firmware, a range of interfaces for device communication, secure over-the-air firmware update, and remote management. With the complete hardware specification of M2351, a security software company, SPI-Korea, can easily implement their secure AMI solution for modem card which connects meters and cloud servers. M2351 also contributes the crypto acceleration during the cryptographic computing in order to save CPU time for different communication protocol modules by its powerful hardware functionalities during message transmission outside of a microcontroller unit.
SPI-Korea has developed a range of Armv8-M TrustZone based technologies. Her expertise covers Boot Manager, Key Manager, and Device Manager, which is very useful for microcontroller security and certainly shows the stability of a microcontroller device. Also, they are certified by Korea Electricity Company. We hope this successful experience can be further adopted in other areas worldwide because it’s a secure, accurate and environmentally safe solution for AMI.
This slide is a picture for SPI-Korea AMI modem card design. NuMicro Family microcontrollers can be utilized for designs of auto-metering infrastructure devices. We start from AMI modem card and we are confident to support meters of any next-generation of AMI. We now integrate M23-based microcontroller with M4-based or Arm9-based microcontroller as a proposal for next-generation modem card of Korea AMI and we hope to provide high-performing cost-effective solution for all AMI devices in the future.
-
For more information, please visit Nuvoton Technology Website: https://bit.ly/3hVdcmC
contact us: SalesSupport@nuvoton.com